

How to Hold a Football: Tips for Perfect Technique
January 4, 2025Last updated: · By Jake Turner
To throw a football well, grip the ball with your fingertips across the laces, keep a small gap between your palm and the ball, set a balanced stance, and drive the throw with your hips and shoulders. Good football throwing technique is a chain: each step, from grip to follow-through, makes the next one easier. This guide covers each link in that chain and what the research says about quarterback mechanics.
Key Takeaways
- Place your index and middle fingers across the laces and keep your palm off the ball for the most control.
- Keep your feet roughly shoulder-width apart with your knees slightly bent to create a stable base for the throw.
- In a pilot study of football quarterbacks, shoulder external rotation averaged about 56 degrees at ball release.
- Your index finger should be the last part of your hand to touch the ball, which helps generate spin and accuracy.
- Throwing practice with a plan, including video review, catches more mechanical errors than repetition alone.
What Is Football Throwing Technique?
Football throwing technique is the set of grip, stance, body movement, and release mechanics that let a passer deliver an accurate, tight spiral. The technique is built on how the ball is held, how the body generates force from the ground up, and how the arm and hand finish the throw. Because a football is an oval and not a round ball, the grip and release have a larger effect on the flight path than they do in many other sports.
Most quarterbacks and youth players can improve quickly by fixing the basics in order. Start with the grip, then the stance, then the rotation and release. Each stage depends on the one before it.
How Do You Grip a Football for Throwing?
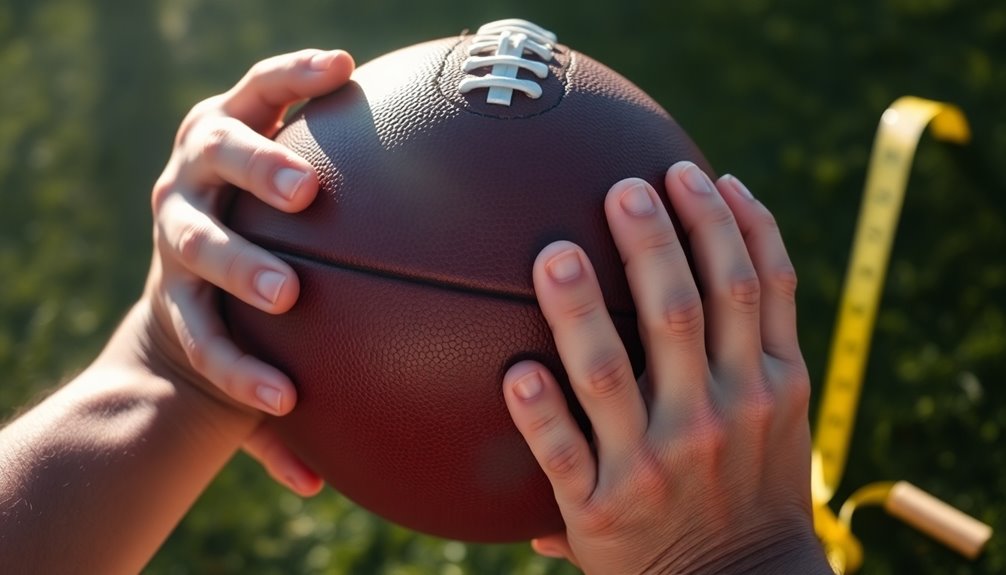
To grip a football for throwing, hold the ball with your fingers on the laces and your palm off the surface, creating a small gap between the ball and your hand. The fingertips and first joints do most of the work, while the palm stays light. This setup gives you control without tension.
Step-by-Step Grip Setup
- Hold the ball in your throwing hand with the laces facing up, toward your fingers.
- Place your index finger near the top of the ball, with the tip touching the laces or just beside them.
- Place your middle finger across the laces, which many coaches teach as the main contact point for control.
- Set your ring finger and pinky on or near the laces for added stability, without pinching the ball.
- Form a loose L shape with your thumb underneath the ball, and check that a small gap remains between your palm and the surface.
Grip Pressure and Finger Release
Grip pressure should be firm enough to keep the ball secure but relaxed enough that your wrist can snap through the throw. A grip that is too tight can slow your release and reduce accuracy. Check your grip by tossing the ball softly and feeling whether it stays put without your fingers straining.
Your index finger should be the last part of your hand to leave the ball. That final touch imparts the rotation that produces a tight spiral. If your palm pushes the ball out first, the ball often wobbles.
How Should Your Stance Be Set Before a Throw?
Set your stance with your feet about shoulder-width apart, your knees slightly bent, and your weight balanced over your feet. This base lets you move without losing balance and makes it easier to transfer force from your legs into the throw. A stance that is too wide or too narrow can throw off your timing.
Keep your weight on your back foot as you load the throw, then shift it forward as you step into the pass. Many quarterbacks find that a slight bend in the knees makes the first movement smoother. Practice this with your eyes up, scanning the field while your feet stay set.
How Does Body Rotation Create Throwing Power?
Body rotation creates throwing power by moving force from the legs and trunk into the arm, so the arm does not carry the whole load. Research on quarterbacks shows that the trunk, pelvis, and shoulder move in a connected sequence rather than all at once. The throw is a kinetic chain, and each segment passes energy along to the next.
A 2025 pilot study published through PubMed Central used wireless inertial sensors on football quarterbacks and reported that shoulder external rotation averaged about 56 degrees at ball release. Because it was a pilot study with a small sample, it describes a pattern rather than a fixed target for every passer. Still, it gives you a useful reference for how far the shoulder turns as the ball leaves the hand.
A separate exploratory analysis of 11 male quarterbacks linked shoulder abduction and horizontal adduction at maximum external rotation to trunk and pelvis rotation at front-foot contact. In plain terms, the more your hips and trunk have turned by the time your front foot plants, the more the shoulder is set up to release the ball efficiently. The study is available on PubMed for anyone who wants the full findings.
Earlier three-dimensional work by Rash and Shapiro, published in the Journal of Applied Biomechanics, filmed 12 collegiate quarterbacks and found that peak shoulder abduction torque occurs before maximum shoulder external rotation. Peak internal rotation torque comes just after that point. For you, this suggests the arm is not simply whipped forward; the muscles around the shoulder work in a timed sequence.
Hip Rotation in Practice
To use your hips in the throw, start by turning your hips toward the target as you step with your front foot. Let your trunk follow, then bring your throwing arm through. Rushing the arm before the hips have turned usually produces a weaker, flatter pass.
Why Throwing Motion Differs by Sport
A review of research on throwing biomechanics in professional baseball and football found that timing, velocity, and arm angles differ between baseball pitching and football throwing. Those differences also shape the injuries each sport tends to produce. The lesson for football players is that a passing motion should be built around the football’s shape and the quarterback’s body, not copied from a baseball pitch.
| Finding | Study Type and Sample | What It Means for Your Throw |
|---|---|---|
| Shoulder external rotation averaged about 56 degrees at release | Pilot study with wireless inertial sensors on football quarterbacks | Expect a large shoulder turn at release, but treat 56 degrees as an average, not a rule |
| Shoulder motion linked to trunk and pelvis rotation at front-foot contact | Exploratory analysis of 11 male quarterbacks | Turn your hips and trunk before the arm reaches its farthest point |
| Peak abduction torque occurs before maximum external rotation | Three-dimensional analysis of 12 collegiate quarterbacks by Rash and Shapiro | Keep the arm moving in sequence rather than forcing a single hard throw |
What Are Common Throwing Mistakes and How Do You Fix Them?
The most common throwing mistakes are an overly tight grip, a poor stance, overstriding, and a short follow-through. Each one reduces accuracy or power, and most can be fixed with focused practice. Use the checklist below to find the problem in your own throws.
- Grip too tight: Loosen your fingers and keep your palm off the ball. Toss softly until the ball feels secure without strain.
- Unbalanced stance: Reset your feet to about shoulder width with knees bent before every throw.
- Overstriding: Take a controlled step toward the target. A step that is too long pulls your upper body out of line.
- Late hip turn: Start rotating your hips as your front foot lands, not after your arm has already moved.
- Short follow-through: Finish with your throwing arm pointing toward the target, which helps carry velocity and direction.
- Not scanning the field: Look up before you throw, so your feet and eyes work together.
How Do You Practice Throwing Technique?
You practice throwing technique by using short, focused sessions that target one part of the motion at a time. Regular repetition with a clear goal builds muscle memory faster than long, unstructured throwing. A simple weekly routine can cover grip, footwork, and release.
- Warm up with light tosses and arm circles for five to ten minutes.
- Spend the first block on grip only, tossing short distances and checking finger placement after each throw.
- Add footwork drills that focus on setting your stance and stepping into the throw.
- Finish with full-motion throws at a controlled pace, emphasizing hip rotation and follow-through.
- Record a few throws from the side and compare them to the checklist above.
Video review is one of the most practical tools available. Filming yourself from the side lets you see whether your hips turn before your arm and whether your front foot lands in line with the target. Coaches can also give quick feedback on these same points.
If you coach younger players, start with the basics and avoid teaching too many cues at once. Our guide on how to teach kids to throw a football the right way covers age-appropriate progressions. For a deeper look at the release itself, see how to throw a perfect spiral every time.

Drills for Quarterbacks
Drills that isolate the grip and footwork are the fastest way to fix a specific problem. Try tossing the ball with only your index and middle fingers on the laces to feel where the spin comes from. For a broader set of exercises, see our list of effective drills for flag football quarterbacks, many of which adapt well to tackle football.
Frequently Asked Questions
What Is the Correct Way to Hold a Football?
The correct way to hold a football is with your fingers on the laces, your index finger near the top, and a small gap between your palm and the ball. Your thumb sits underneath in a loose L shape. This grip gives you control while letting the ball release cleanly.
How Far Should My Feet Be Apart When Throwing?
Your feet should be about shoulder-width apart, with your knees slightly bent. This base is stable without being so wide that it restricts your movement. Adjust slightly if you feel off balance, but keep the stance consistent from throw to throw.
Does Hip Rotation Really Affect How Far I Can Throw?
Hip rotation contributes to throwing power because it moves force from your legs and trunk into your arm. Research on quarterbacks links trunk and pelvis rotation at front-foot contact to how the shoulder moves during the throw. Distance also depends on strength and release timing, so rotation is one factor among several.
Why Is My Football Wobbling Instead of Spiraling?
A wobbling pass usually comes from a grip that is too loose, a palm that pushes the ball out, or an index finger that leaves the ball too early. Check that your index finger is the last part of your hand to touch the ball. Practice short tosses that focus on a clean finger release.
How Often Should I Practice Throwing?
Practicing three to four times a week in sessions of 20 to 30 minutes is a realistic goal for most players. Short, focused sessions usually beat long, unfocused ones. Rest days help your arm and shoulder recover between sessions.
Conclusion
Good football throwing technique starts with a relaxed grip, a balanced stance, and a throw driven by hip and trunk rotation. Build each part in order, check your form with video, and practice with a clear goal. Consistent, focused reps will make your passes tighter and more accurate over time.
More on Football Throwing Technique
Related guides: How to Catch a Football Better: Practical Tips for Beginners · Wide Receiver Route Tree Explained (with Diagram) · Building a Winning Team: Fun and Effective Football Drills for Kids and Youth Players
Free tools: Keto Macro Calculator · Keto Net Carbs Chart